Payment
Note. This functionality is only available for the "Professional" version of the boilerplate.
Stripe support
The boilerplate is integrated with Stripe, so first you need to create an account, verify it, and then create products and plans.
Note. Each plan must have a code as described below, see p.4. The plan code is a alphanumeric string that will be used for plan identification.
Note 2. As soon as you created plans and provide all Stripe API keys (see below) all the plans will be available in your dashboard automatically.
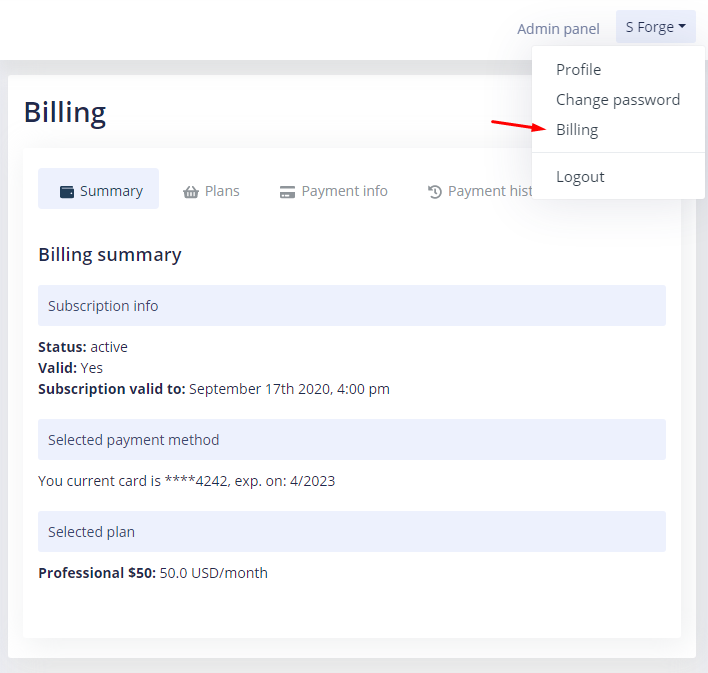
Billing summary
Each user can check his/her own billing summary with Billing menu as shown below:
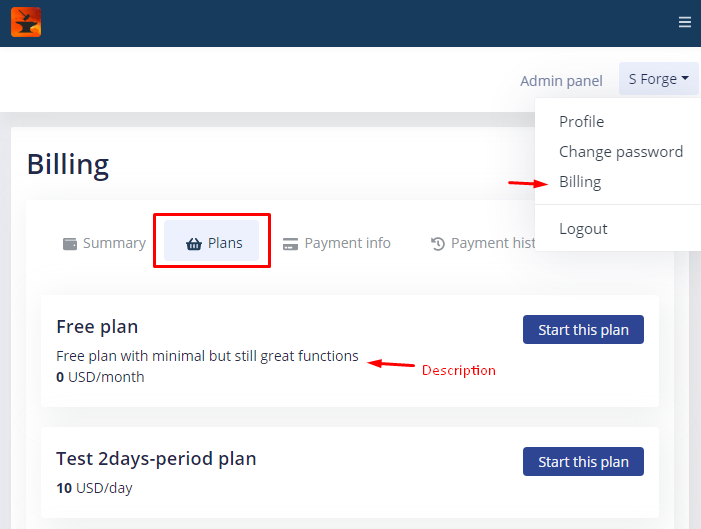
Plans list
When you run the application, if you already set up the integration with Stripe, as described below you may navigate to your billing panel and see the list of active plans, something like that:
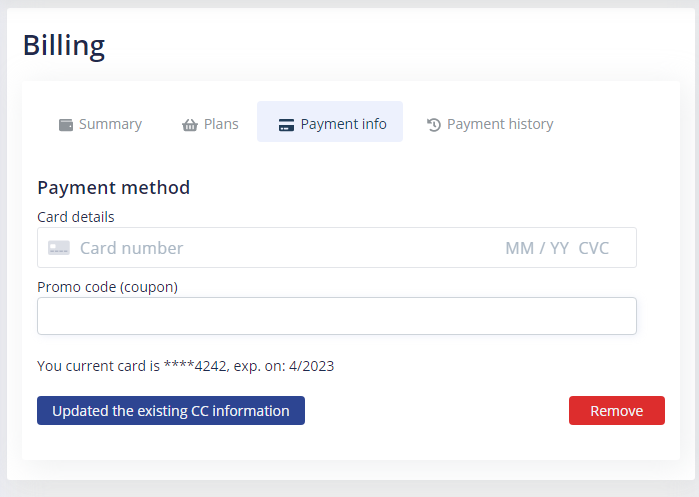
Payment info
If your payment workflow doesn't require to enter the payment information on the registration, user can do it later. He/she can enter the CC information, then remove it, or update it. All the data is coming to Stripe; we don't store any information except 4 last digits of the credit card and expiration data. Also, user may provide a coupon:
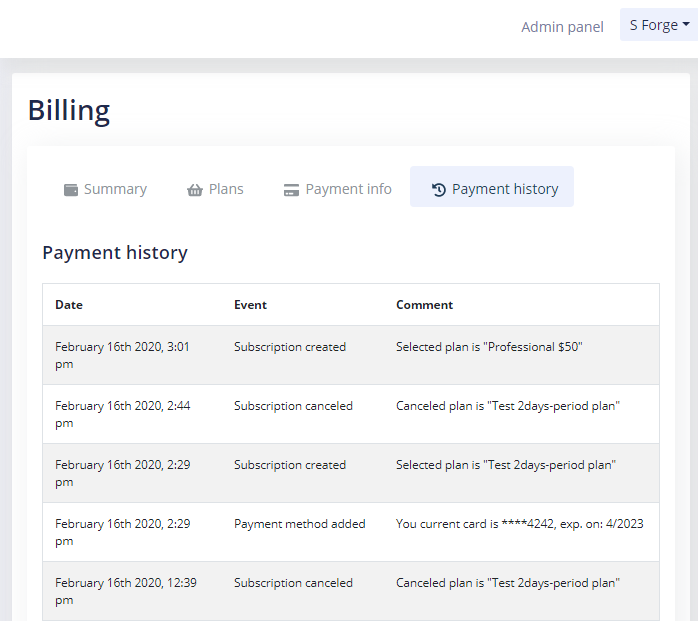
Payment history
Also, a user can check all the events related to the payment using the Billing -> Payment history tab. It has all the events like creating subscriptions, adding payment method etc.:
As you can see the boilerplate pulls out data about plans automatically including title, currency, amount, and description (if provided):
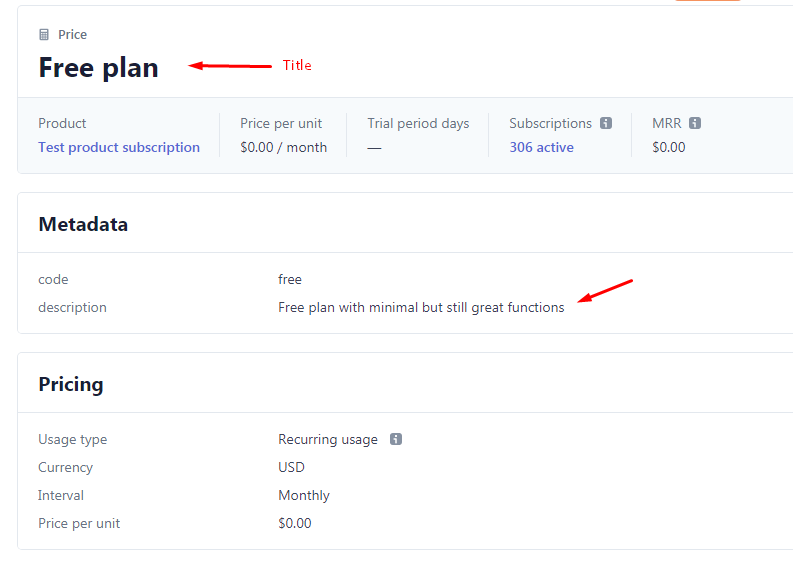
Note. Metadata "code" is mandatory unlike "description".
Preparation
Step 1. Create an account on Stripe, complete the email and account verification
Step 2. On the left panel in the dashboard switch the "Viewing test data" switcher on
Step 3. From the central part, copy publishable key and secret key and paste them into your environment variables:
- STRIPE_TEST_PUBLISHABLE_KEY
- STRIPE_TEST_SECRET_KEY
- DEFAULT_PAYMENT_VENDOR = 'stripe'
Note. Don't forget to add these variables to the config.py in the root folder. For different configuration it's higly recommended to use different values. For example you can add the following values in the DevelopmentConfig class:
STRIPE_PUBLISHABLE_KEY = os.environ.get('STRIPE_TEST_PUBLISHABLE_KEY')
    STRIPE_SECRET_KEY = os.environ.get('STRIPE_TEST_SECRET_KEY')
and into ProductionConfig:
STRIPE_PUBLISHABLE_KEY = os.environ.get('STRIPE_PROD_PUBLISHABLE_KEY')
    STRIPE_SECRET_KEY = os.environ.get('STRIPE_PROD_SECRET_KEY')
Step 4. Create plans at Stripe and add meta fields to each of them:
- code - code name for a plan, for example 'business'
- description - text description of a plan
Getting started
When user signs up, you can give him/her to do it in 2 ways:
- Signing up without selecting a plan
- Sidning up with mandatory selecting a plan (even if there is a trial period)
If the first case the url for registration will be /auth/register. If you require selecting a plan you would pass it as a parameter /auth/register/?plan=plan_code.
Workflows
You can specify almost any workflow with your environmental variables.
-
Default plan code: if no plan is specified (using URL) the default plan code will be assigned (if it should be assigned).
DEFAULT_PLAN_CODE = 'free' // Default plan code is 'free' -
Plan should be selected by user. So, you provide it in URL (as described before). If you don't or user somehow skips it, the exception will be thrown and user will see the error message.
REQUIRE_SELECT_PLAN = False // True means you allow to not to select a plan. -
Require entering payment method if user selects a free plan. So, whenever user selects it (on registration or later) he/she will be required to enter the payment informatioln.
REQUIRE_PM_FOR_FREE_PLAN = True -
Require entering payment method for plans having a valid trial period. If user selects such a plan, or it's assigned on registration, he/she will be required to enter the payment information.
REQUIRE_PM_FOR_TRIAL = True // If False, the payment information can be entered later. -
Require entering payment method if a default plan selected or assigned.
REQUIRE_PM_FOR_DEFAULT_PLAN = False -
Require entering payment information even if no plan is selected or assigned.
REQUIRE_PM_FOR_NO_PLAN = False
For example, how can we implement the following scenario?
- Before signing up, a user selects a plan. He/she clicks the button or link that will open the registration for, passing the plan parameter to the url: /auth/register/?plan=plan_code
- If a plan has a trial period don't require a payment information. Only if there is no a trial period, require it.
- User must select a plan.
Use the following values for env variables for this scenario (other variables don't matter for this scenario):
REQUIRE_SELECT_PLAN = True
REQUIRE_PM_FOR_FREE_PLAN = False
REQUIRE_PM_FOR_TRIAL = False
Coupons
You can create and use coupons for the plans. First, you create a coupon in the Stripe dashboard. You get the coupon ID and give it to your customers. If the coupon is valid it will be applied automatically.
Endpoints
To be able to update the payment information in the real time, webhooks should be established. On the Stripe interface, go Developers --> Webhooks --> Endpoints --> Add endpoint. Add 2 endpoints for the following events:
- invoice.payment_failed
- invoice.payment_succeeded
As for URL, it depends on the environment you currently use. If it's local, you have to install tools like Ngrok (https://ngrok.com/) and use the following formats for URLs (URL is the same for both endpoints):
https://XXX.ngrok.io/app/api/payment/stripepayment
where XXX is your ngrok id (you will see it in the command prompt).
If you are running your website on the Internet and it's alive, use the following format for URL:
https://yourapp.com/app/api/payment/stripepayment